
To use autopilot in a Cessna 172, activate the system then select your desired mode, such as heading hold. Ensure the aircraft’s stability before engaging the autopilot to maintain the selected course or altitude.
Mastering the art of autopilot in a Cessna 172 can significantly enhance your flying experience, offering both comfort and efficiency during flight. This sophisticated feature helps pilots maintain steady control without manual input, allowing for more focus on navigation and monitoring aircraft systems.
Learning to operate the autopilot system requires understanding the various modes, such as altitude hold, heading, or navigation tracking, and how to properly engage and disengage the system. Whether you are cruising over long distances or need to free up your hands momentarily, using the Cessna 172’s autopilot can be a valuable skill for any pilot, contributing to safer and more enjoyable flights.
The Basics Of Cessna 172 Autopilot
Mastering the autopilot on the Cessna 172 increases both safety and efficiency during flight. This fundamental guide provides the essential steps for using the Cessna 172’s autopilot system, even for new pilots. Let’s ensure your flights are as smooth as possible!
Anatomy Of The Cessna 172’s Autopilot System
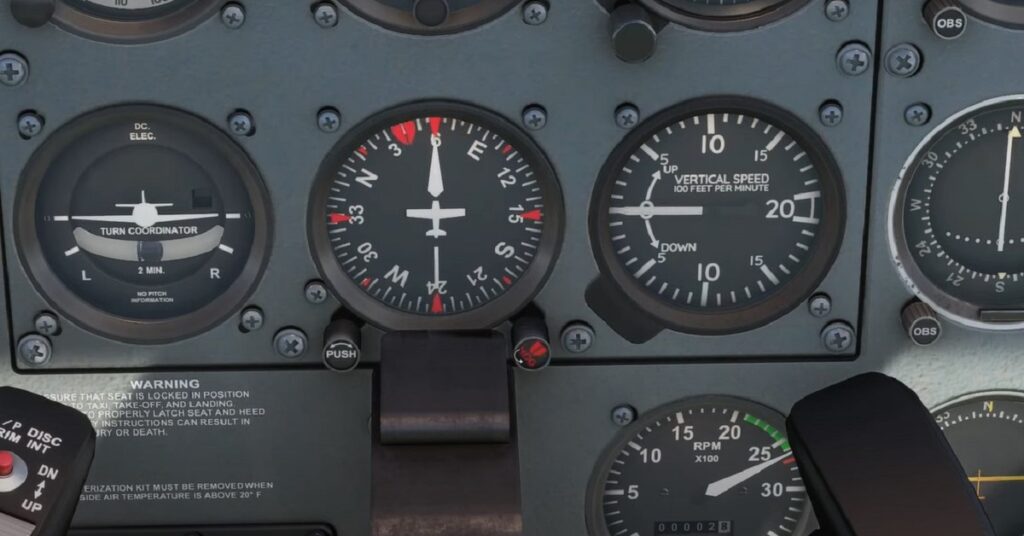
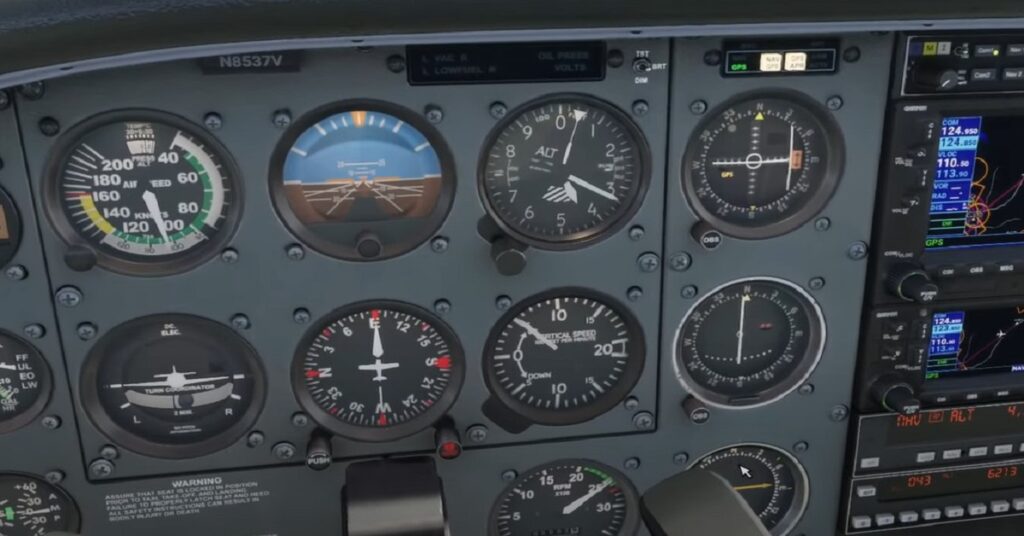
Understand your Cessna 172’s autopilot with these key components:
- Control Panel: Where you input settings.
- Servos: They move the control surfaces.
- Altitude Hold: Keeps the aircraft at a set altitude.
- Heading Mode: Directs the plane to a compass heading.
- NAV Mode: Follows a flight plan or VOR.
- Vertical Speed (VS): Climbs or descends at set rates.
Initial System Checks Before Engaging Autopilot
Perform these checks to ensure autopilot reliability:
- Confirm the autopilot is disengaged before starting.
- Check the circuit breakers related to autopilot.
- Review the flight control surfaces for free movement.
- Test the trim settings for proper functionality.
- Ensure the navigation equipment is set correctly.
Remember: Always be ready to take manual control if needed.
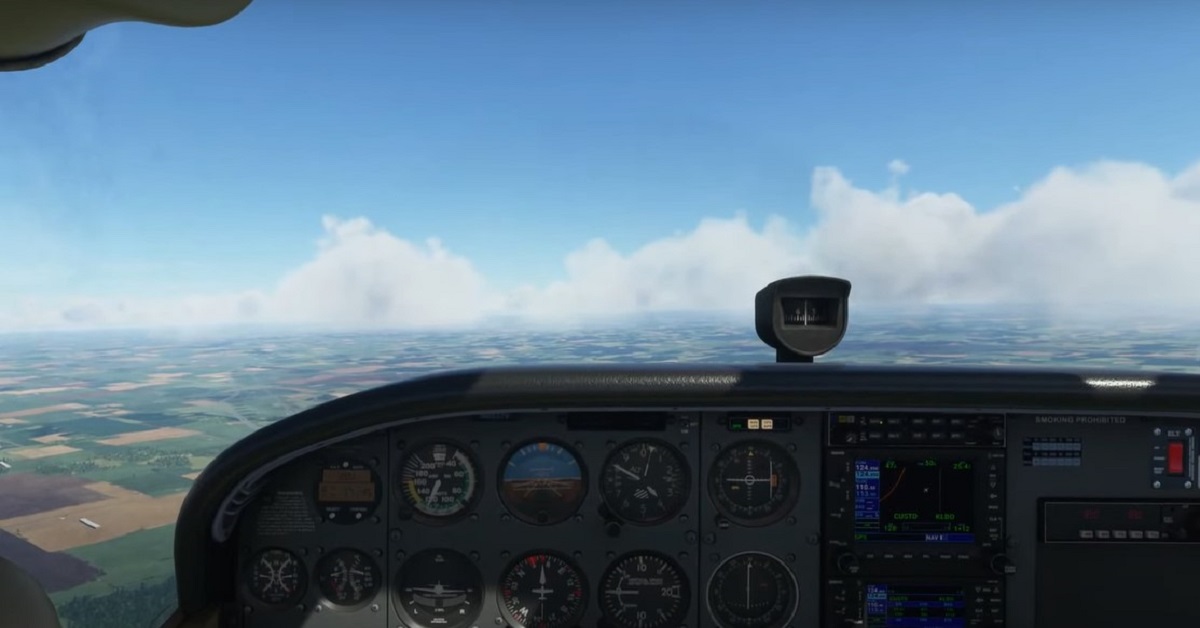
Activating Autopilot
Flying a Cessna 172 can be an exhilarating experience, especially when you make use of the autopilot feature. Let’s simplify the process of activating the autopilot system, ensuring a safe and enjoyable flight.
Step-by-step Guide To Engaging Autopilot
Before engaging the autopilot, ensure that the aircraft is stable and well-trimmed. Follow this guide:
- Turn on the autopilot master switch. You will find this on the instrument panel.
- Check the annunciator panel for any warning lights.
- Select the desired autopilot mode. Start with a basic mode like heading hold or altitude.
- Adjust the mode settings using the control panel.
- Monitor the aircraft’s response to ensure the autopilot engages correctly.
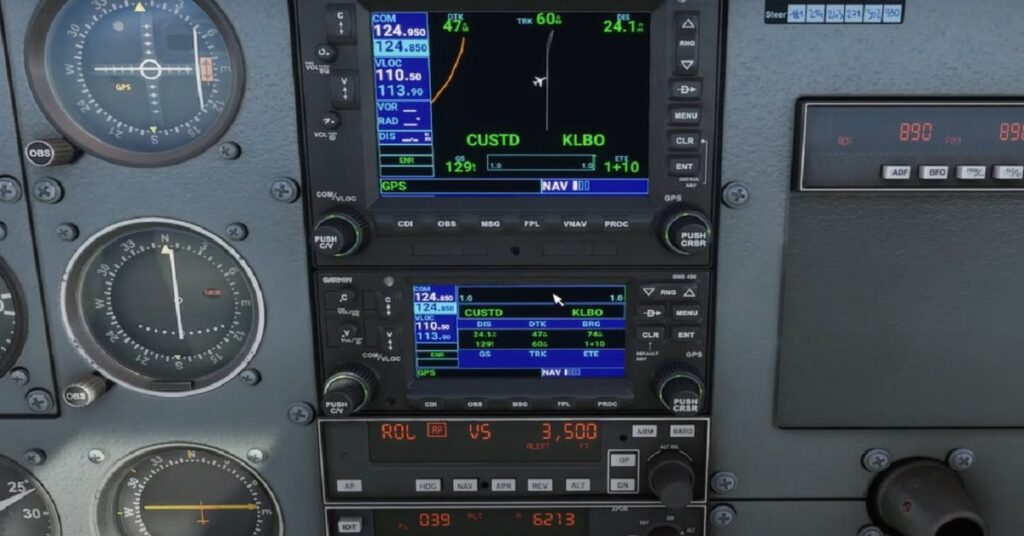
Understanding Modes: Rol, Pit, Hdg
Knowing autopilot modes is crucial. Each serves a unique function:
- ROL (Roll): This mode maintains the wing’s level or a constant bank angle.
- PIT (Pitch): This mode holds a specified pitch attitude.
- HDG (Heading): Engage this mode to follow a compass heading.
Use the autopilot’s modes to maintain course, and altitude, or to follow a navigation signal. Practice with each to become proficient.
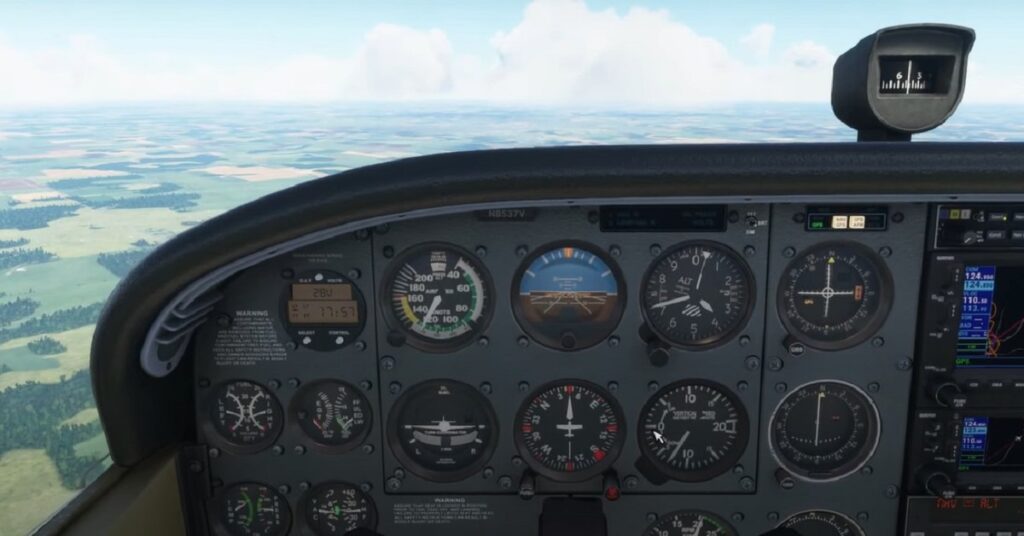
Navigating With Autopilot
Flying a Cessna 172 becomes easier with autopilot. You can enjoy the skies while the plane follows a path. This section covers key autopilot features. Let’s explore how to use Heading Mode and GPS Mode for accurate navigation.
Using The Heading Mode (hdg) Effectively
Taking control of your flight path is simple with Heading Mode. This mode keeps your Cessna on a straight line to your chosen compass heading. To use it:
- Select the HDG button on your autopilot.
- Turn the heading bug to the desired course on your directional gyro. The heading bug is the small knob on the instrument panel.
- Once set, your plane will turn towards that heading and maintain it.
Here are some additional tips:
- Check the wind direction and speed to set the right heading.
- Use small adjustments to stay on course.
- Keep an eye on your flight instruments to ensure accuracy.
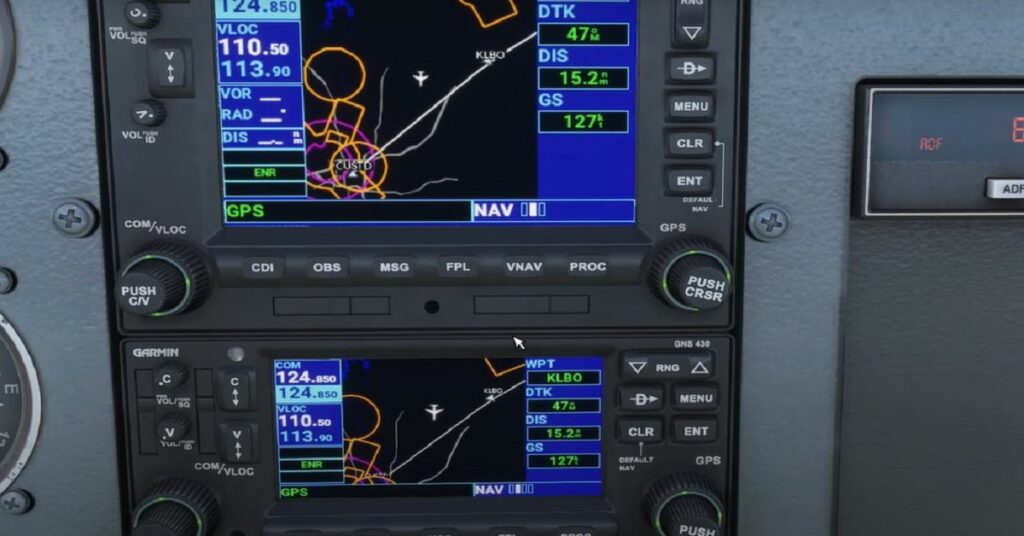
GPS Mode Guidance For Accurate Tracking
For longer flights, GPS Mode ensures you stay on the planned route. Your Cessna will follow waypoints from your flight plan. Here’s how to activate it:
- Ensure your GPS is set up with the correct flight path.
- Press the GPS button on the autopilot panel.
- The airplane will automatically adjust to follow the path.
Remember these key points:
- Double-check your GPS waypoints are correct.
- Monitor progress on your navigation display.
- Stay ready to make manual corrections if needed.
Altitude Management
Mastering altitude management ensures a smooth and safe flight in a Cessna 172. The autopilot makes it easier. By setting the correct altitude and using Vertical Speed mode, pilots can keep their flight on track. Let’s take a look at each step.
Setting And Maintaining Altitude
To set the altitude on a Cessna 172’s autopilot, follow these simple steps:
- Turn the altitude knob until it shows the desired altitude on the autopilot display.
- Engage the ALT mode by pressing the appropriate button on the autopilot control panel.
- The autopilot will now maintain that altitude, adjusting the plane’s pitch as necessary.
Maintaining altitude is critical. Regularly check the altitude readout against your target. Ensure the autopilot is holding the plane steady. If it’s off, make small adjustments using the altitude knob.
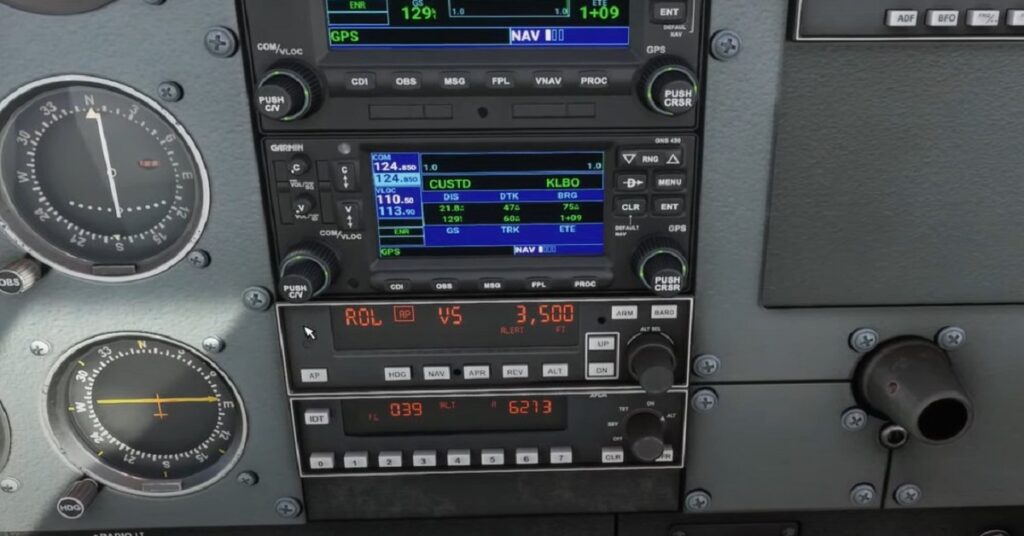
Engaging Vertical Speed (vs) Mode
Vertical Speed mode lets pilots control the rate of ascent or descent:
- Select the VS mode on the autopilot.
- Adjust the vertical speed by turning the VS knob.
- The autopilot will change altitude at the rate you set until reaching the preselected altitude, then level off.
Use Vertical Speed mode to manage climbs and descents without overwhelming the autopilot. Fly smoothly as you reach your target altitude.
Advanced Features Of Autopilot
Enhancing your flying experience with advanced autopilot features can transform how you navigate the skies. The Cessna 172 comes equipped with capabilities that allow for sophisticated flight management. Understanding these features ensures precision and safety during your flight.
Mastering The Flight Level Change (FLC) Mode
The Flight Level Change mode optimizes your aircraft’s performance. Unlike other modes, FLC maintains airspeed rather than a vertical speed during altitude changes. This mode is particularly useful during climbs and descents, as it adjusts throttle settings automatically to keep the airspeed constant.
- Engage FLC mode by pressing the FLC button on the autopilot panel.
- Set your desired airspeed before activation.
- Monitor your throttle to ensure it matches the target airspeed.
Using Autopilot For Instrument Approaches
Autopilot significantly aids in the precision of instrument approaches. It reduces workload as pilots can focus more on monitoring instruments rather than manually controlling the aircraft.
- Ensure your navigation devices are set to the correct frequency of the ILS.
- Activate approach mode once established on the localizer course.
- Monitor the glide slope and localizer indicators for a smooth approach.
Note: Always double-check that your autopilot is receiving accurate signals. Be ready to take manual control if needed.
Troubleshooting Common Issues
Pilots often face challenges with their Cessna 172’s autopilot system. Understanding common issues ensures safety and convenience. The troubleshooting tips provided below aim to simplify the process and enhance your flying experience.
Dealing With Autopilot Leveling Challenges
Leveling failures occur when the autopilot cannot maintain the desired altitude. Follow these steps:
- Check the trim: Ensure it’s set for level flight.
- Review settings: Verify the altitude and rate of climb/descent.
- Inspect the autopilot: Look for disconnections or system errors.
Understanding Error Messages And Corrections
Error messages can seem daunting, but they provide clues for correction. Here’s how to handle them:
- Read the manual: Each message correlates with a specific issue.
- Reset the system: Sometimes a simple reset can clear the error.
- Contact support: If issues persist, professional help is necessary.
Safely Disengaging Autopilot
Flying the Cessna 172 with autopilot offers a convenient aid in navigation, but knowing when and how to disengage the system is crucial for pilot safety. Transitioning from automated to manual control must be a smooth process to ensure the aircraft’s stability and the safety of everyone onboard. This guide will walk you through the safest practices.
Procedures To Follow
- Check the instruments. Ensure you’re at a safe altitude and there’s no immediate traffic or obstacles.
- Inform ATC. If applicable, let air traffic control know you’re taking manual control.
- Hands-on controls. Place your hands on the yoke and feet on the rudder pedals.
- Disengage the autopilot. Press the autopilot disengage button or switch.
- Regain manual control. Smoothly take control to maintain course and altitude.
Common Missteps And How To Avoid Them
- Not ready to take control. Always have your hands ready to take over immediately.
- Ignoring trim settings. Remember the aircraft might be trimmed for autopilot. Adjust as needed.
- Overcorrecting. Make small adjustments to course and altitude to avoid instability.
Disengaging the autopilot should never be a rushed or abrupt action. Gentle and informed transitions ensure you maintain control and avoid unnecessary complications. Always refer to the Cessna 172’s operating manual for specific instructions tailored to your aircraft model.
Building Proficiency With Autopilot
Learning to use the autopilot in a Cessna 172 is a critical skill for modern pilots. It not only reduces workload but also enhances flight safety. Building proficiency requires practice and understanding when and how to hand over control to the machine or take it back. Here’s how you can master the art of autopilot.
Practice Scenarios For Skill Improvement
Developing autopilot skills comes from engaging in various flight scenarios:
- Level flight path management
- Altitude changes and holding
- Navigation using VOR and GPS
Each scenario helps build confidence.
For level flight, practice engaging and disengaging the autopilot. This teaches you to understand its impact on flight dynamics.
In altitude changes, focus on setting and maintaining specific altitudes. Use the autopilot to climb or descend to preselected altitudes smoothly.
Navigating with VOR and GPS modes refines your understanding of the autopilot’s response to course adjustments. Try flying predefined routes using these navigation aids.
Transitioning From Autopilot To Manual Control
Knowing how to switch back to manual control is as important as engaging autopilot. Here are steps to ease the transition:
- Determine the appropriate time to switch based on traffic, weather, and pre-landing procedures.
- Gently disengage autopilot to avoid sudden control inputs.
- Re-assume control smoothly to maintain the current flight path.
Regular practice of these transitions during your flights will sharpen your reflexes and ensure safety.
Frequently Asked Questions For How To Use Autopilot In Cessna 172
How Does Autopilot Work In A Cessna 172?
The autopilot in a Cessna 172 maintains altitude, heading, or follows a GPS route, engaged by the pilot to assist with aircraft control.
How Do You Use The Autopilot On A Cessna 172 Xplane?
To use autopilot on a Cessna 172 in X-Plane: Activate the system, select your desired mode, and adjust settings as needed for heading, altitude, or navigation. Always monitor autopilot engagement and aircraft response throughout the flight.
How Do You Turn On Autopilot On A Cessna Citation?
To turn on autopilot in a Cessna Citation, engage the system by pressing the “AP” button on the autopilot control panel.
What Are The Limitations Of Autopilot In Cessna 172?
Autopilot in a Cessna 172 cannot counter severe weather, has limited altitude and heading inputs, and lacks full automation capabilities like auto-land. It requires regular pilot monitoring and cannot handle complex navigation tasks on its own.
Conclusion
Mastering the Cessna 172’s autopilot can transform your flying experience. Embracing this tech means safer, smoother flights. It’s vital to prioritize safety and practice regularly. Always keep your manual skills sharp—you never know when you’ll need them. Fly smart, fly safe, and enjoy the skies with confidence!
